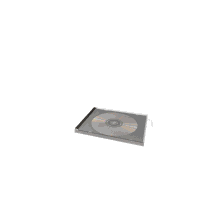
1. Open your CD burner. There's usually a button on the outside you
can press to open it. Place the CD in the burner. The side you will
burn onto should be face down. Close the burner, again using the same
button you used to open it.
2. Wait a minute. A box should pop up on your screen with a variety of
choices. Click once on the choice that says "Open Writable CD Folder
Using Windows Explorer." (There's a picture of a manilla folder next
to it.) Your choice should turn blue. Click OK.
3. A box opens up representing the empty CD you want to burn. Now take
your mouse pointer and place it on the top blue border of this box.
Press and hold (don't click) with your left mouse button, and drag the
box down into the lower righthand corner of your screen.
4. Locate your My Documents folder on the desktop. If this folder
isn't on the desktop, you should put it there for convenience sake.
See the tip How to Put a Shortcut on your Desktop.
5. Now simply press on the folder with your left mouse button and drag
the folder onto the empty box representing your CD in the lower right
corner. You should see the contents of your folder being copied over.
If you get a box asking if you want to copy "Thumbs" files, you can
say "Yes" or "Skip." It's your choice. These files aren't important,
trust me. You can also check the box to repeat your answer for each of
these files to save time.
6. When the folder is completely copied to your CD box, clik on "Write
these Files to CD" on the lefthand side of the box. A "wizard" pops
up.
7. Click Next in the wizard (ignore the CD name and date underneath)
Wait for the CD to burn. You'll see a green line progress across the
screen.
8. When the CD is done, it should pop out of its drive, and you can
click on Finish in the wizard. Label your CD with a Sharpie or other
felt-tip pen, and you're all backed up!